the GuideLines for this project were for the game to be specifically built to run on VR with a minimum of 90fps. the time frame to complete the game demo was 6 uni weeks like the previous projects and the final product was to be a high-fidelity working prototype that we would show to industry professionals at the end-of-year showcase. The main theme of the game had to be suitable to the target audience we chose between educators, students, technophobes, and assisting those with disabilities the group ended up deciding to make a historical exploration game where as you explore you can pick up or interact with objects to have them teach you about them and give fun facts. We were assigned into groups of 4-5 with set roles decided in a group discussion with me being assigned as the only coder to build the main mechanics of the game focusing on getting all the base mechanics done first then if enough time onto puzzles and more all in a white box with a basic map layout to conduct tests. In the end, I ended up completing the code for base game mechanics but was left without most of the intended assets so the final product was left mostly looking the same as the white box. most of the coding I did was done by myself with some help from accessible YouTube tutorials to get an understanding of what I needed to do as I have never worked with VR coding before.
The software used include: 1. Unity 2. Visual Studios also used youtube videos for some help with coding as I never had to code for VR before and didnt know most aspects.
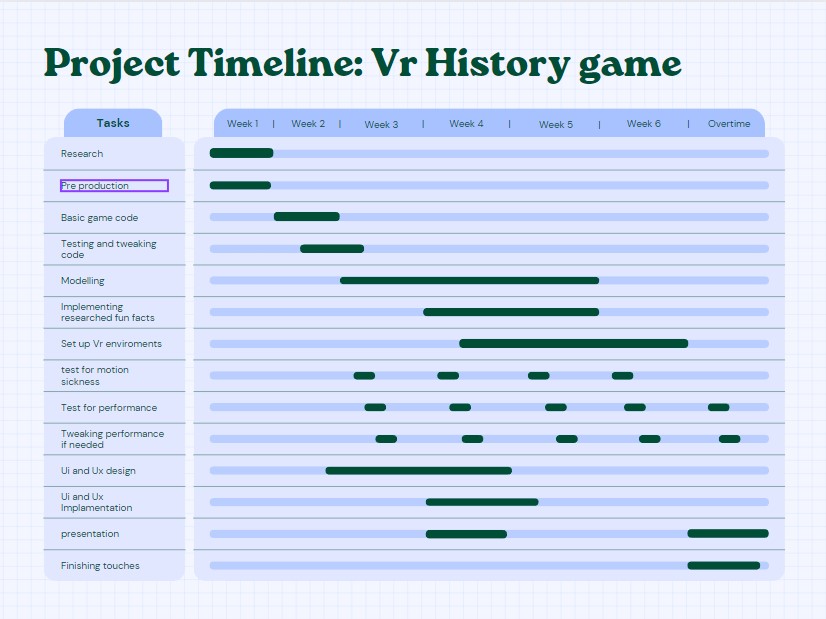

The Gannt chart was created at the start of the project as preproduction to figure out how much time should be allotted to each part of the project and what can be worked at side by side to help with efficiency and setting aside time in case of emergency or last minute tweaks that needs to be done.
I created the mind map to help with the idea generation process in the beginning stages and set the outlines of our options and their pros and cons, what we needed the software we were going to use and the specific requirements for the oculus store and VR that we needed to uphold while making the game. I also lost the saved file to the mindmap so i do not have an image currently.
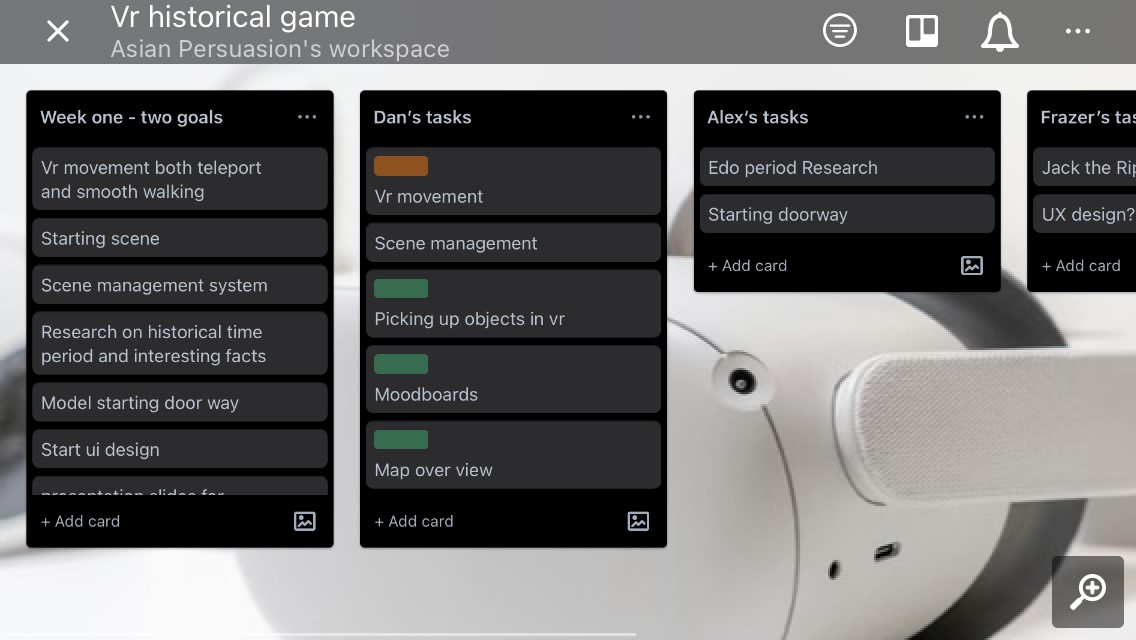
We also made a Trello board to keep up to date with the tasks that we needed to do and the tasks that we have already completed helping us understand where we are as a group in comparison to the Gantt chart I made so we could see if we were lagging behind or had extra time to do other tasks.
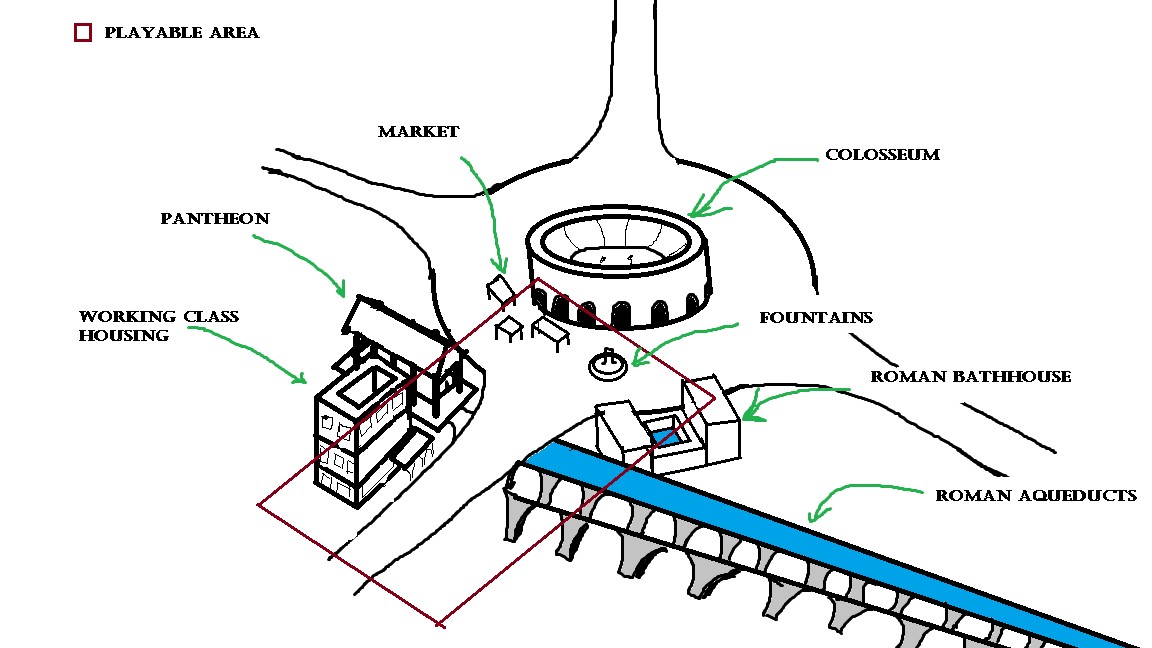
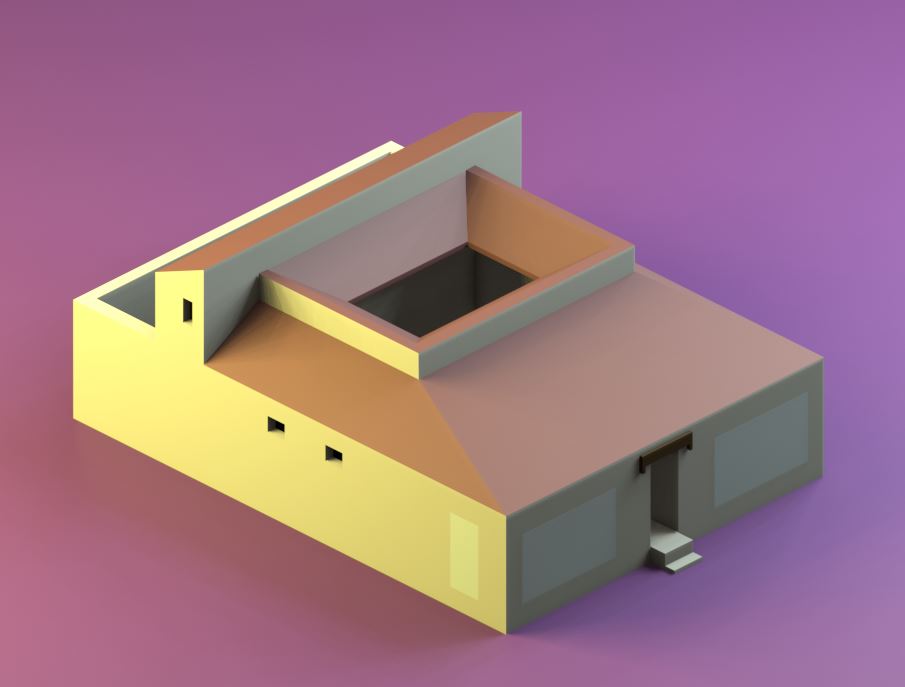
I also did a quick sketch in Ms paint to get a visual of the map layout i invisioned and the read boarder signifies the actual playable area of the game to limit how much we need to make for the world to still seem alive in some sense and hold decent quality.
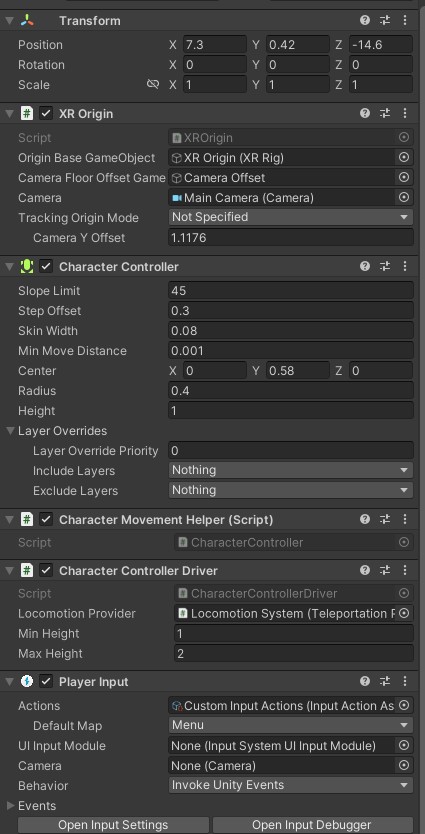
Setting up Unity for VR compatibility and coding was confusing and challenging at first with me having to rely on mostly YouTube videos to figure out what needed to be imported for VR to work first I had to go to window - packet manager and install the XR and XRI packages. then setting up the VR required to Drag in the XR origin download the Oculus official controller meshes and attach them to the XR origin in their respective left and right-hand slots. to get movement working you have to set up the interaction and Locomotion system and correctly connect them up to each other and the XR origin and also connect them to the XRI default Input actions to read the inputs and also the specific input actions for each hand. the left and right hand also need a ready-made script of the XR Controller (Action based) and the main XR Origion also should have a Character Controller Driver which you'll have to find and drag onto it.
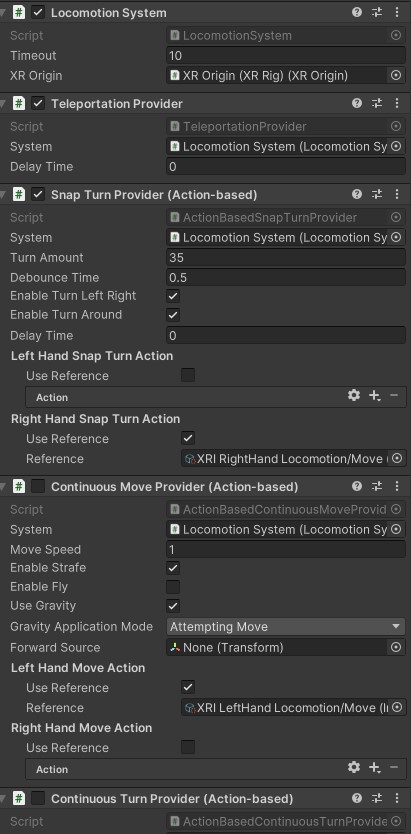
First I had to set up the Locomotion system and XR Origin for movement that required the Locomotion System to have the teleportation and snap Turn provider attached and for the XR Origin I had to attach a Character Controller and make my own Character controller script where it grabs the components of the XR Origin and the character driver and controller to make the rigid body adjust when the player lower or raises the headset which in most cases is standing up or crouching down. this is good as it makes the rigidbody more realistic and adapts to how tall you are at the time meaning you can crouch under an object if you want. however, all of this is clamped so you cannot break the game.
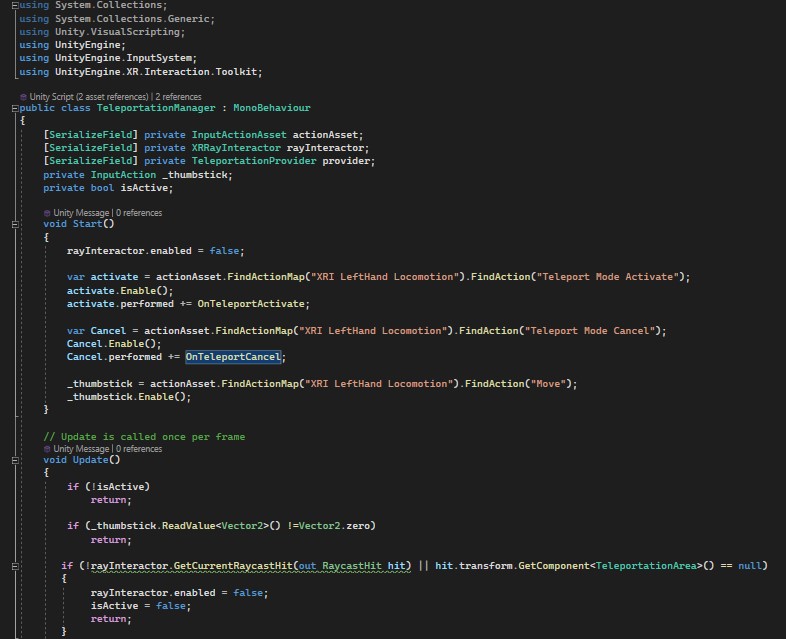
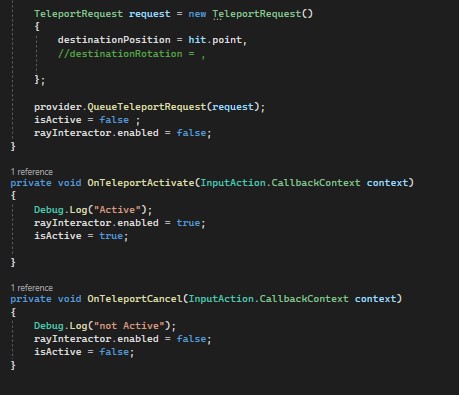
at the start of the script, it grabs 2 Inputs from the default XRI input manager for the left hand specifically and one from "Move" which is where the joystick input is stored. in the update it keeps checking for the conditions to run the teleport being if "Isactive" isn't true it returns and no action is performed. to make "Isactive" true the input manager has to sense the teleportation action activating which also turns on the rayInterator so the player can see where they are teleporting to and so the game can get the raycast hit transformation of where it needs to go. then Update looks for if the joystick has moved by constantly getting its vector 2 and if it's anything other than 0 it means the joystick has moved in some direction. then if the rayinterator isn't enabled or if the raycast hit isn't on a teleportation area it sets the rayinterator off and is active off, this is for when you try and teleport to an area that isn't meant to be teleported on so it doesn't run the rest of the teleportation code to move the player there. if everything goes through it sends a Teleportation request with the destination being the Hit.point at the end of the curved ray, there is also an option of setting the rotation and maybe in the future if I would do something like this again I could match the final teleportation rotation to match that to the angle of the joystick but at present, I had no clue how to do so. once the request goes through and you get teleported it sets "Isactive" to false and the Rayinterator off.
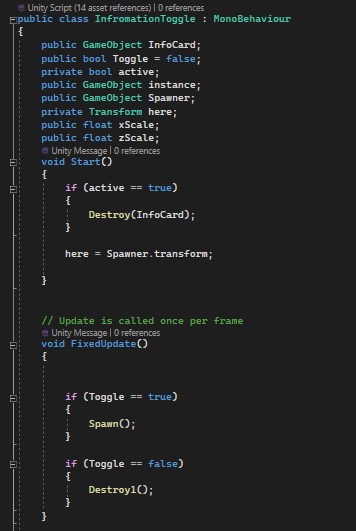
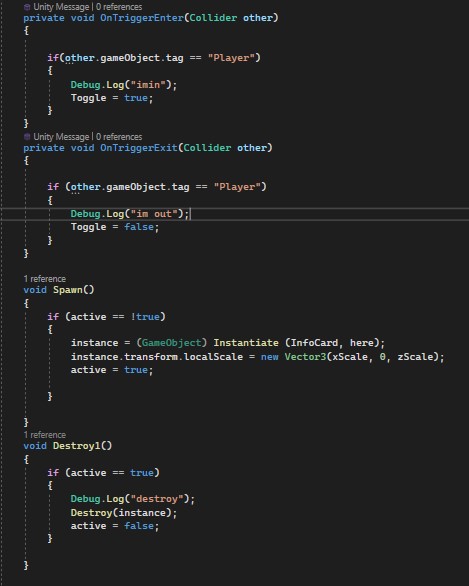
For the Information toggle script, it first grabs the prefab of the information card which you can assign the object in the inspector, and also grabs the spawner to find the location of where it needs to instantiate, the spawner is simply an empty gameobject in the needed location. at the start, it checks if the card is already active and spawned in if so it will destroy the card so there is nothing when you first spawn in. There are 2 ways to spawn in the cards either by entering a Trigger which will instantiate the card at the spawner or when you pick up an object and press the right trigger it will spawn the card. the trigger works as the spawn and despawn runs on a bool which can be changed by the controller when the input manager detects the trigger gets pressed and it sets the bool as active. however you have to hold down the trigger for it to work currently this could be improved on if I ever come back to the project, also for this project while this method works for such a small game it is better to already have the cards in the scene but have their mesh's disabled and enabled when these actions happen instead.
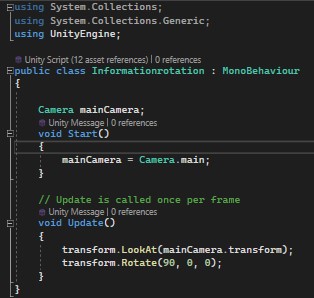
The information rotation script is rather simple in the sense that all it does is get a reference to the main camera and tell the cards to always transform to look at what we declared as the main camera's transform.
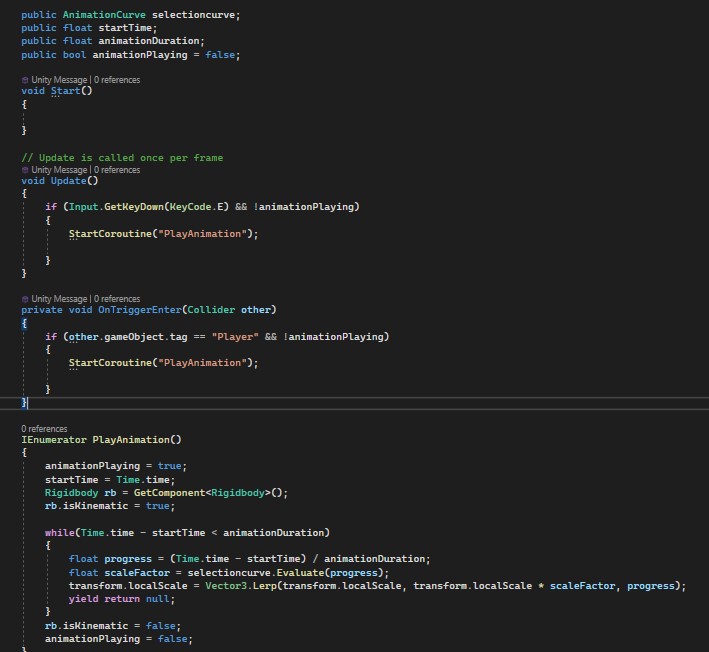
The pickup animation works with an animation curve this code was mostly given to us by our lecturer on how to set up the curve and its parameters all we had to do was play with the curve to get the effect we wanted.
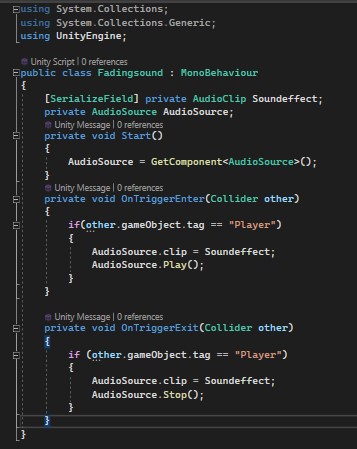
The Fading sound script is no longer needed now I managed to get the regular audio source 3D sound working however at the time I made the script to control when and where the sound will play using the ontriggerenter and exit to decide when to start and cut off the audio. this method required me to call the sound effects and audio source in the code which is inefficient.
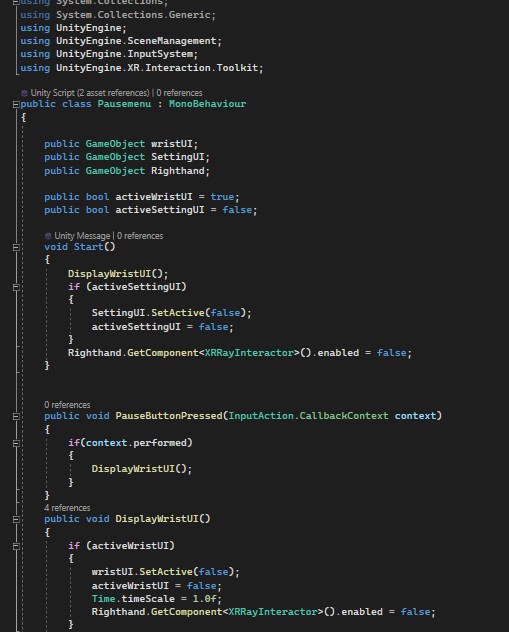
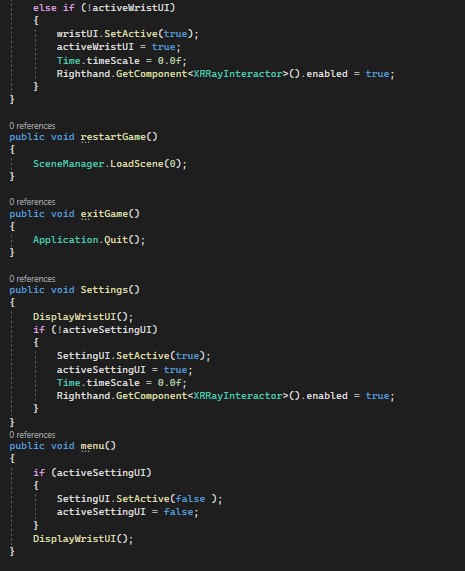
The code for the Pause menu was complicated at first to set up however it made sense the further along I progressed. first I had to grab a reference to everything I needed which is the canvas for both menus those being the pause menu and settings and also getting the righthand to refer to the rayinteractor on it. there are 2 bools to tell if a canvas is up or not. at the start, it checks if the pause menu is running, and if it is the code turns off both the pause and settings menu just for safe measure and turns off the righthands rayintoractor as it should only appear when you activate the menus. then a Coroutine where it checks for the pause button pressed and if the input action declared in this context is pressed it runs another Coroutine which spawns the pause menu. if the button is pressed when the menu is already up and "activeWristUI" = true it removes the pause menu and sets everything to false but if "activeWristUI" doesn't equal true it activates the wristUI and sets "activeWristUI" to true and also sets the time scale to 0 pausing the game in the background also enabling the right hands rayintoractor so you can press the buttons on the menu. If you click on the settings button it performs the same routines but with the canvas being the settings canvas instead and it disabling the pause menu until you click a button to go back. on the pause menu, there are 2 other buttons one to quit the game which when pressed just runs an Application.quit() command, and a restart level button that reloads the scene.
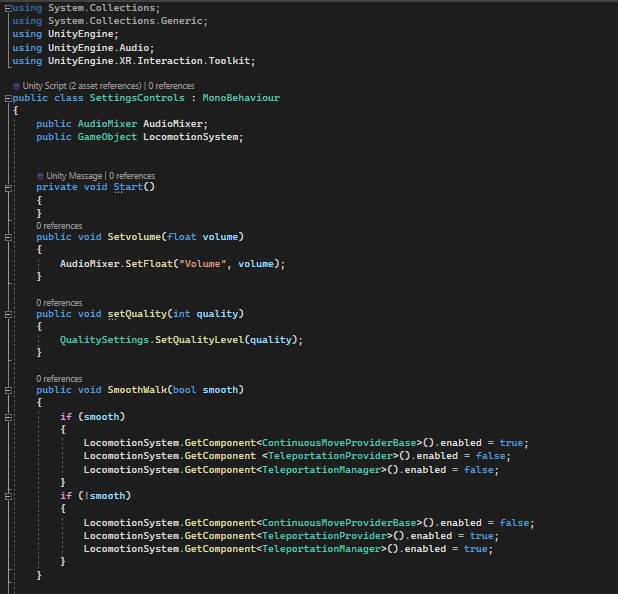
The setting menu allows you to change 4 things those being the master volume of the game, and the graphics quality and allows you to change the movement and turning to either smooth or snap and teleporting individually for player comfort. to do this I first needed to reference the master audiomixer and the locomotion system to access the scripts on it. the audio mixer already has code for the job with that being .setFloat allowing you to change the float value of the volume, to make this work you attach the script to the main canvas and on the slider under on Value changed to also drag the script that's on the canvas into it and go to the function and find the script and use the "Coroutine name" Dynamic float. setting the quality was quite easy as there is already inbuilt code in unity of "Qualitysettings.setQualityLevel" It uses integers of 0,1,2 to cycle through 3 preset quality levels all you have to do is add them onto a Dropdown textmeshpro and on value change choose the Dynamic Int. to change the movement and turning code in settings I just used 2 checkmark boxes to tell if you have the smooth turn or walking enabled if checked they disable to teleportation code and enable the movement code and vice versa. I am quite happy with how the settings turned out to be functional and helpful to the player with me not expecting to manage to get the changing of scripts to work.
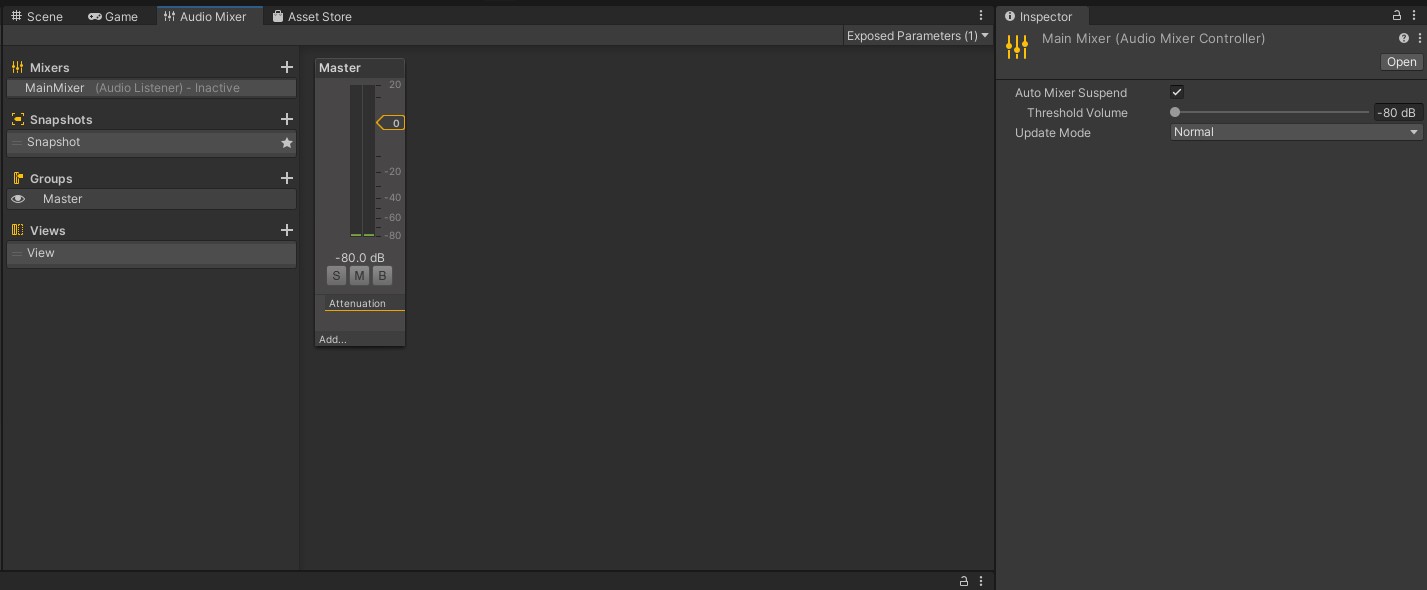
To set up the audioMixer first you pull up the AudioMixer screen by going to the window tab - Audio - Audio Mixer and when on the audiomixer screen click the plus by where it says "mixers" and name it whatever you want then you have to expose the parameters on the newly made mixer at the top right underneath the three dots.
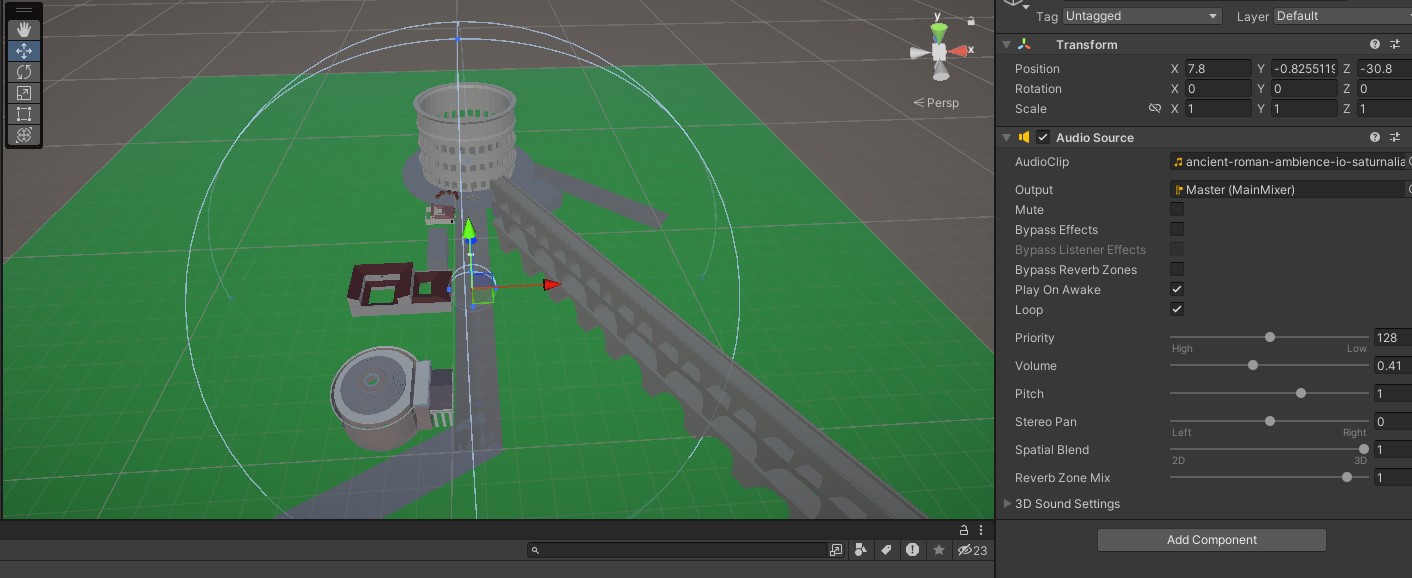
For the main background audio, I made an empty object and set it in the middle of the street and attached an audio source to the object with the desired sound effect in Audioclip, for the output I put it in the master mixer so the settings volume bar can affect it as well. then I made sure to change the slide bar from 2d to 3d so the volume dropoff worked and then simply played around with the other options to find out what worked best and also messed around with min and max distance to find a desirable range.
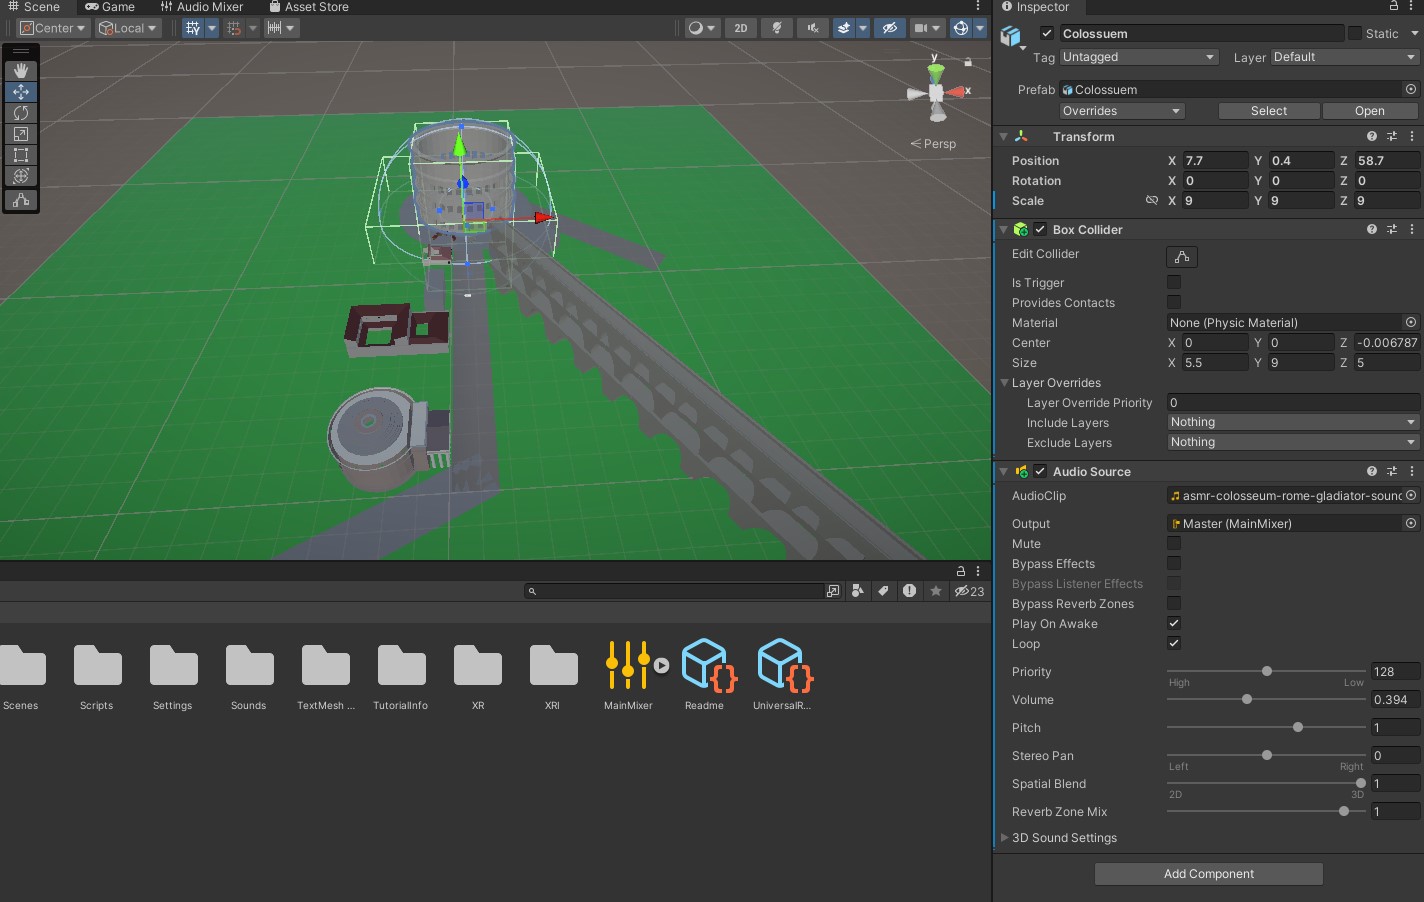
for the colosseum audio instead of making an empty object, I attached it directly onto the colosseum and did the same things as I did for the background audio but with less range as I didn't want the colosseum to be heard from too far away as it wouldn't be too realistic as the sound should be confined within the walls and somewhat muffled.
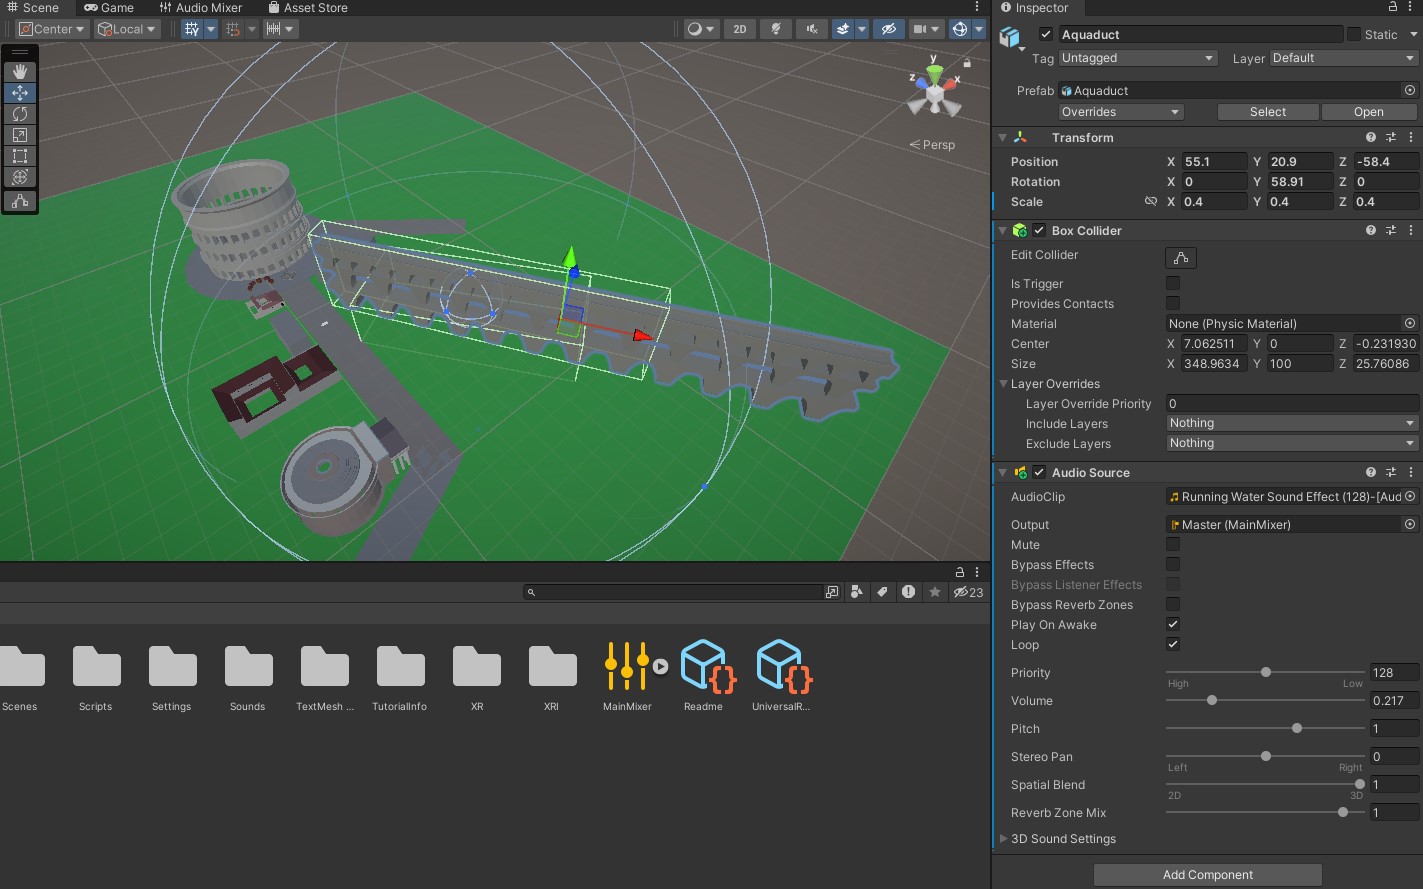
For the aqueduct, I followed the same steps as the colosseum but with a smaller min range and much larger max range as flowing water usually can be heard from very far away but as I didn't want it as loud I made the minimum distance smaller so its more spread out across the distance.
The scene management script is quite simple with a ontriggerenter for the first level door and then a scene loader using the scene name so I can simply put it on buttons and change which scene they load individually.
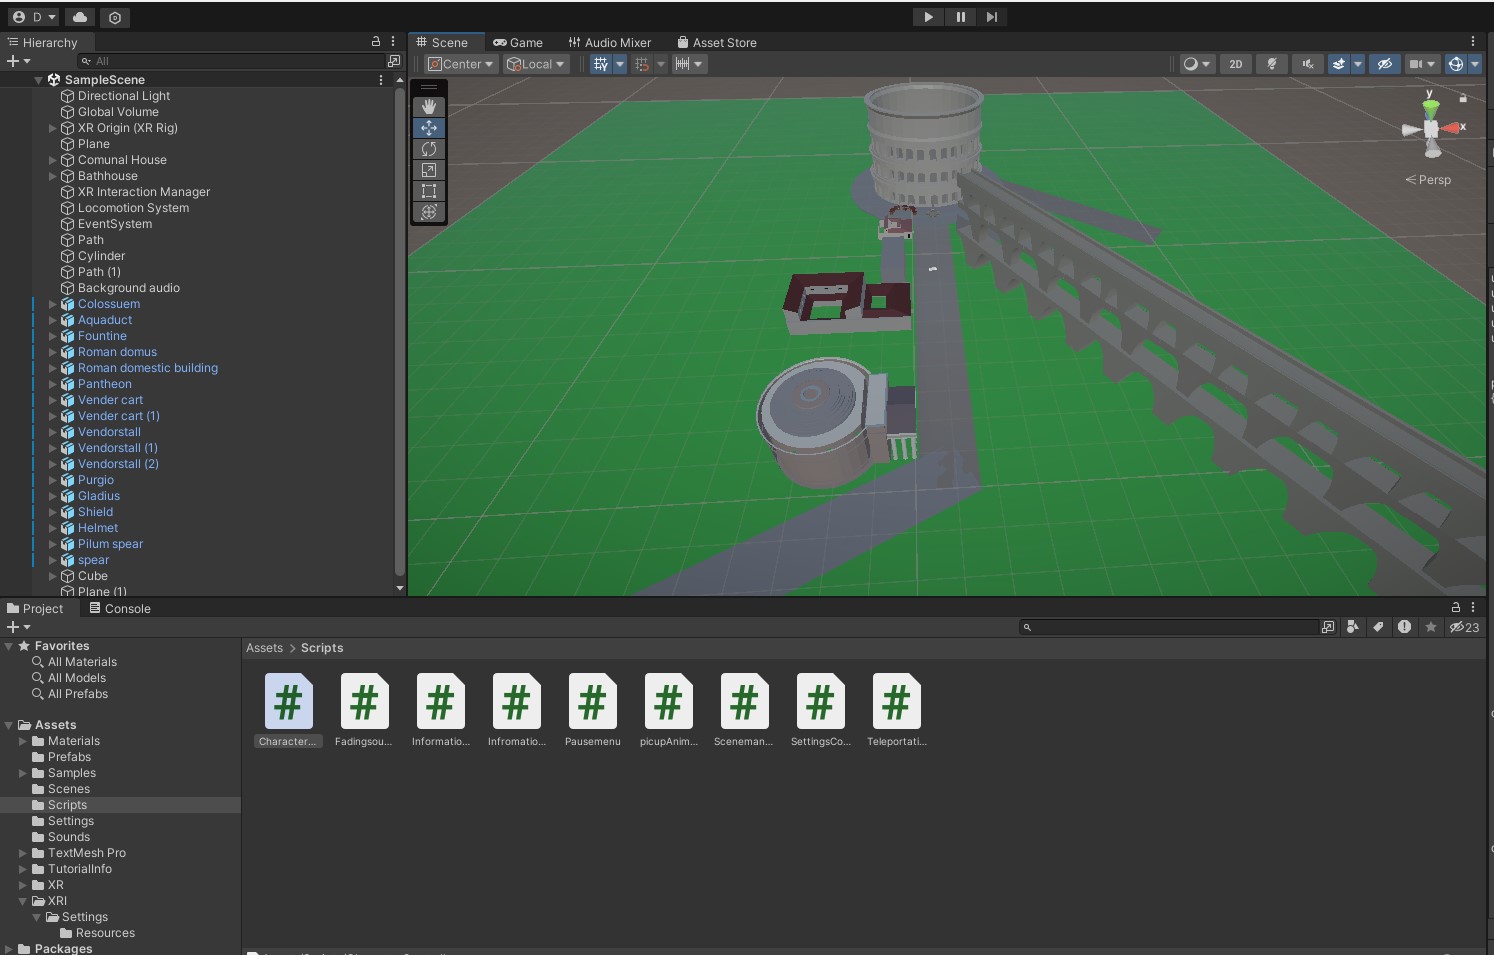
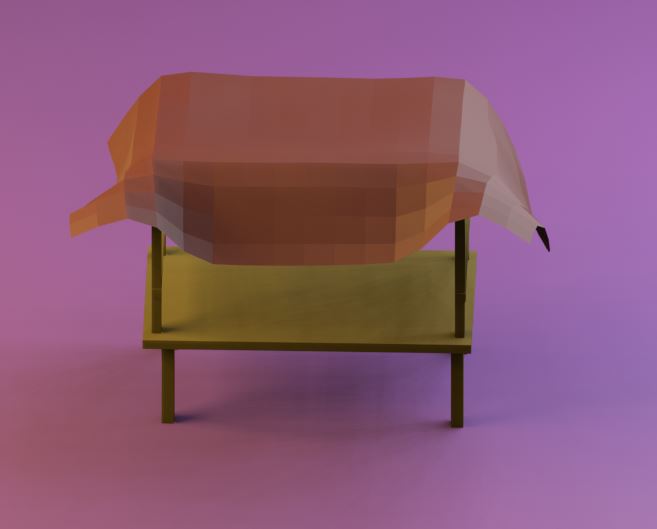
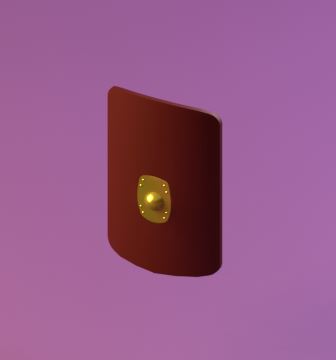
I created these models at the last minute to flesh out and add to the world because my teammates who were focusing on modeling were somewhat behind and we needed more assets to fit with the information cards that were created earlier in the project. A lot of these models were made quite simplily with the use of mostly just the extrude tool and loop or knife cuts.
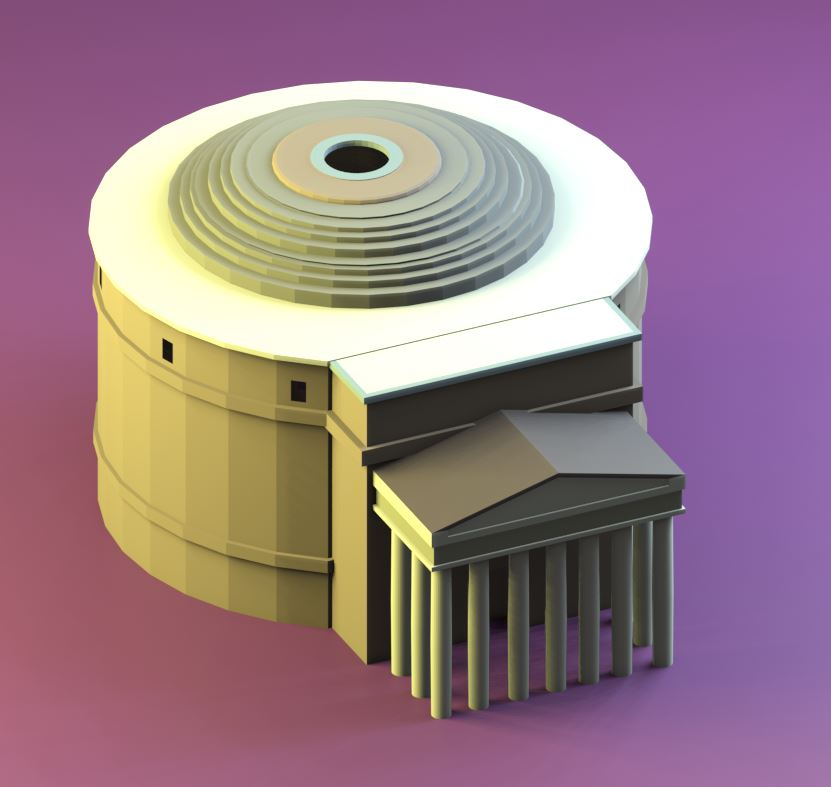
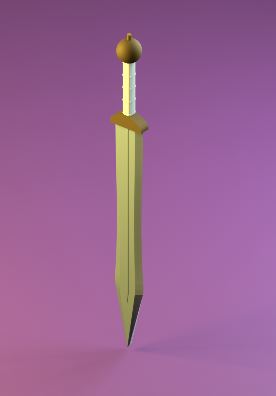
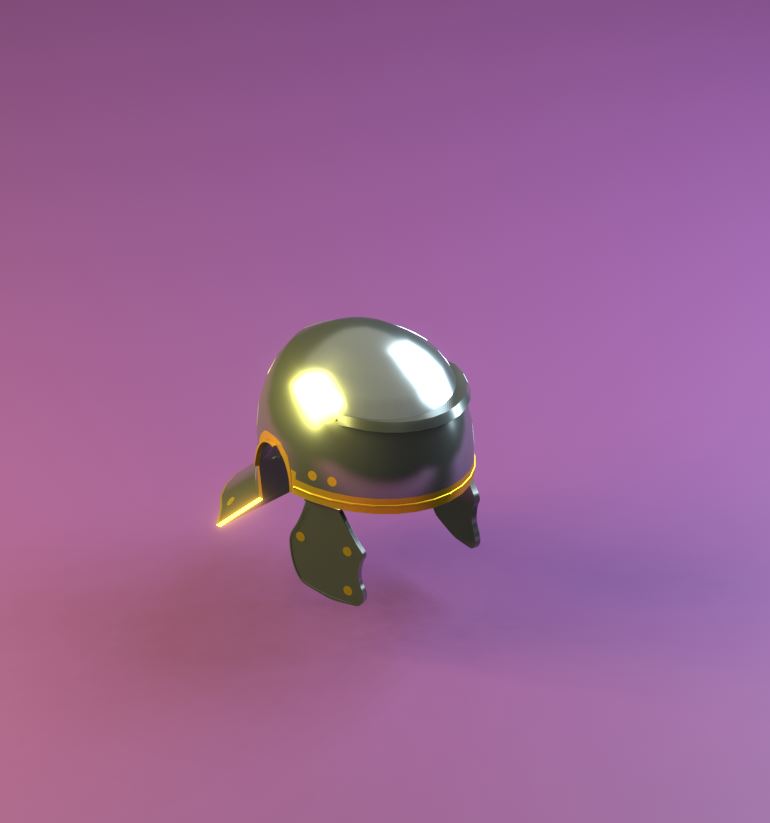
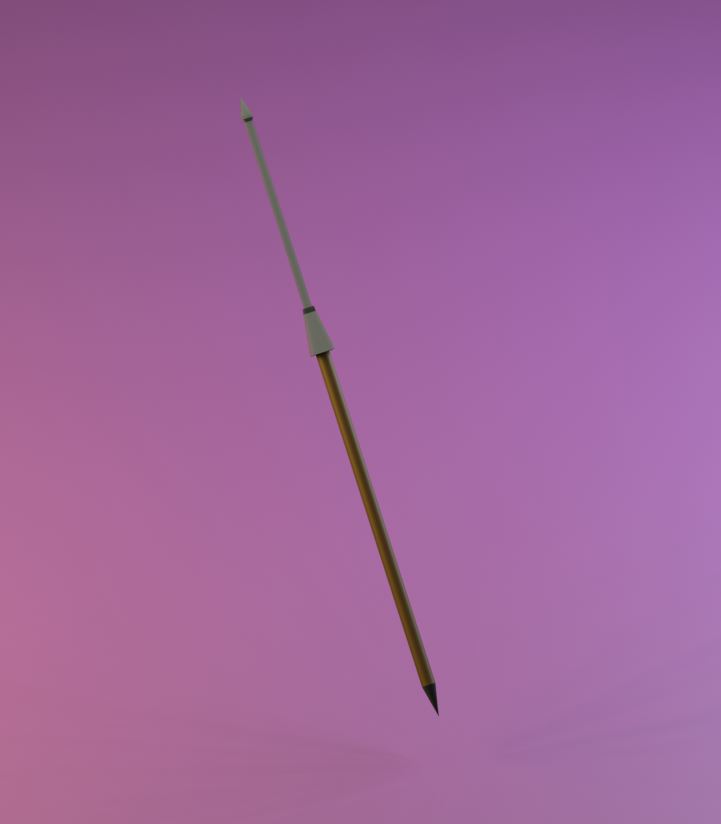
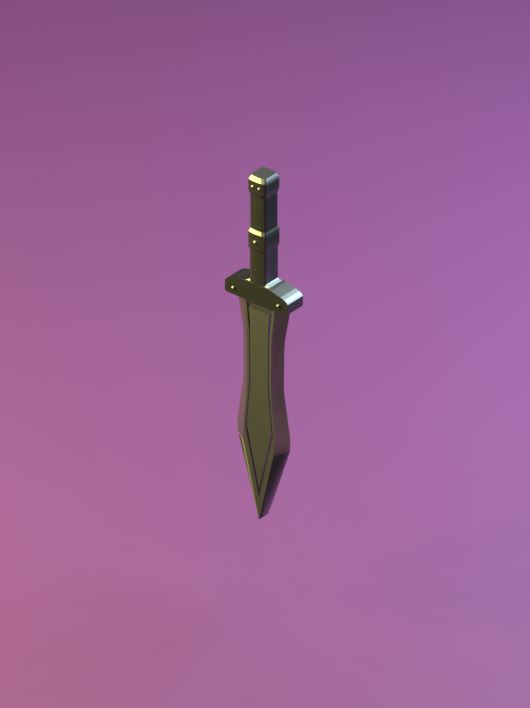
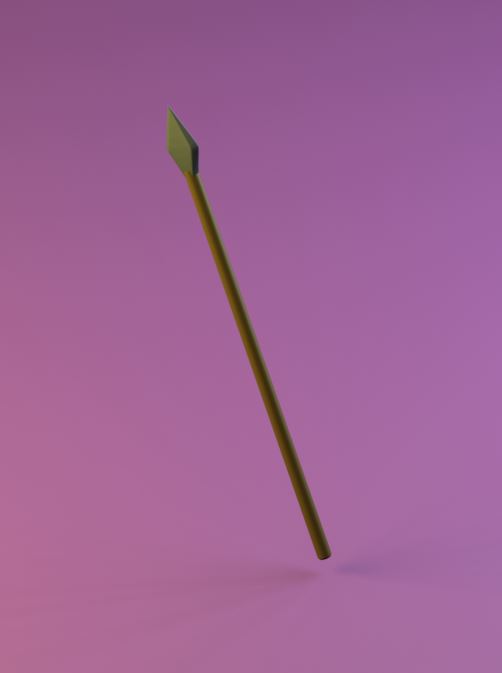
These artifacts are created so that you can pick them up and examine them while learning what they are I didn't have enough time to go into massive detail with the models so I just tried to get down their rought shape and apperance.
the fountain base was made by creating two cirles scalling them into ovals and crossing them then deleting the overlapping vertacies and joining whats left. then simple extrudes for the rest of the shape.
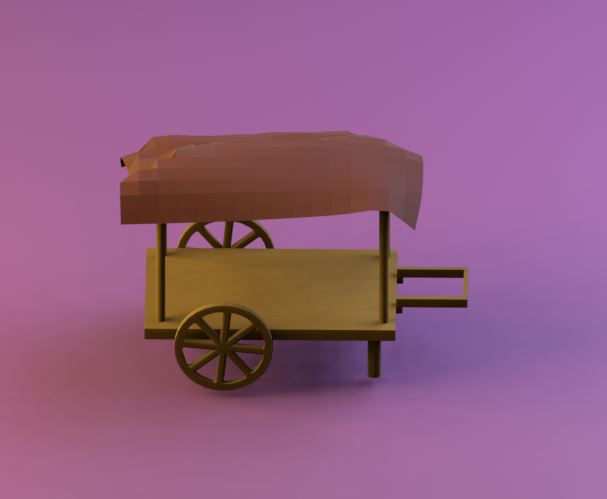
The cart was simple to make with using basic cubes for most of the object however the wheels are cicles that have been extruded inwards and out and for the cross sections I selected the opposing inner faces and made new faces out of them and repeated that as many times as needed.